Here we go over some of the essential info you need to grow plants in Coco-coir.
What Is Coco Coir And How Is It Made?
Coco coir is a by-product of coconut fibre. It has been used for centuries in the West, though popularity temporarily waned as good-quality coco was in short supply and what was available degraded too quickly to be viable or cost-effective in most growing situations.
With the more recent growth in the popularity of organic gardening, and the availability of high-quality coco, it has seen a resurgence as an environmentally sustainable substrate.
Coco coir is made of coconut shell fibre. Coir is extracted from the shell and ground into a growing substrate. The coconut is cured and mechanically treated, in a process called ‘retting,’ which takes a little over a week to complete – compared to the six months it took centuries ago. This makes it much more cost effective too.
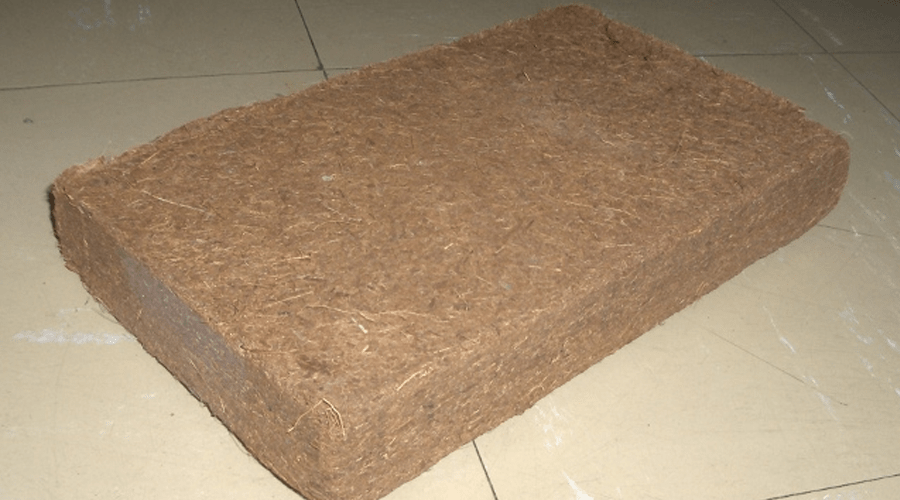
The coconut fibre is combed off of the shells. This fibre is called coir. It is dried, pressed into a shape (such as a brick, disc, or pot) or left as a loose much which can be bagged. At this stage, it is ready to be used.
Types Of Coco Coir
Variations in this process can produce three types of coco coir: pith, fibre, and chips. Some people use only one kind, while others use more than one in combination.
Coco pith, sometimes called peat, is a rich brown moss-like material. It is excellent at absorbing and holding water, which has its benefits of course, but if used on its own it can overwhelm a plant with moisture and provide the conditions for rot to set in.
Coco fibre is a stringier material, usually sold in bundles, which allows more airflow and so you get an increase of oxygen to the root systems of your plants. The fibres don’t hold as much moisture as the pith ones do, but it can be reused a few times while it breaks down, and is excellent for use mixed in with the pith.
Coco chips are made up of chunks of coir. The chunks are porous, so they do retain water, but they hold up very well too. Of the three, this is the best choice if you are going to use only one, rather than a combination.
The best method, once you gain some experience using these different products, is to mix your own combinations of these three, to customise your growing supplement to the conditions you desire. Until you get to that point – or if you simply want to save yourself the added time and effort – there are commercially-prepared mixtures available for sale. You can buy dried bricks, for example, and all you need to do is add water. As with most commercially available products though, quality tends to be sacrificed in order to minimise production costs. If you truly want the best, you should learn to mix it yourself.
Pros and Cons of Growing in Coco
Pros
There are pros and cons of using coconut coir as a growing medium.
One benefit is that you will get quicker harvests and bigger yields. If you use coco coir for drain-to-waste growing, your plants will not need to search for nutrients as much, and that saved energy will instead go into growth and production of the crop itself.
Another benefit is that the coco coir can retain water well, without clogging up the soil or making it too dense. The airflow and looser soil can help plants to develop good root systems with good air exposure, without drying them out.
The pH value of coco coir is neutral (5.2-6.8) – at least to begin with – so you won’t need to worry about it skewing the pH of your soil one way or another. It will fluctuate over time, however, so you’ll still want to keep an eye on things.
Coco coir can minimise harmful pathogens and even reduce the risk of infestation by pests. Coco coir has antifungal properties, helping to keep roots happy and healthy, too.
Most gardeners are aware of environmental issues and have a desire to garden in earth-friendly ways. Coco coir is great for that. A coconut tree produces 150 coconuts, on average, and much of the fruit – the shell – would normally go to waste. Coco coir is made from this by-product though, so it not only helps your garden, it is beneficial to the earth as well.
Coco coir can be reused – if it’s treated properly. When correctly prepped, coir is durable and holds up well for more than one harvest, making it even more economical and environmentally friendly… not to mention giving you a great crop!
Cons
Yes, there are a few cons to using coco coir too. These are minor though, and any potential ill effects can be lessened with a little care.
Salt Content – depending on where you get your coco coir, and how it is produced there, there can be a high salt content. Some manufacturers rinse their coco coir before packaging, but others don’t. If you buy the cheapest available, you’ll probably need to rinse it yourself to ensure you don’t raise the salt content of your soil to a dangerous level.
Coir bales are sometimes treated with chemicals to prevent pathogens from blooming inside of them. The chemical residue can affect certain crops and hamper plant growth. A visit to the manufacturer’s website or a good read of the package small print can let you know if there were chemicals used on the product.
Coco coir has a high cation exchange rate, so it stores and releases nutrients very freely, as needed. It does, however, tend to lock up calcium, magnesium and iron. You’ll want to boost these using a supplement to ensure the best results for your plants and crop yield.
How to Grow in Coco-Coir – Step by Step
1. Pre-Soak Coco
In order to make sure your plants get the necessary amount of nutrient salts, you should pre-soak your coco media before planting. To do this, simply apply a ¾ feed to full strength feed until you see a run-off begin to collect in the tray under the container.
Your pH level will tell you the acidity levels of your soil. It should be 6, as an ideal, but anywhere between 5.5 and 6.5 will be a comfortable range for most plants and will ensure that most nutrients are available when your plant needs them.
To adjust the PH, Add nutrients and boosters (before altering the pH), then alter the levels with pH Up or Down (a single drop at a time), then if you add too much one way or the other, adding water to help neutralise it.
CF/EC Control
The CF/EC indicates how strong your feed is. The ideal CF depends on your growing cycle and how hard your water is. For young plants, your CF should be 6-12. As plants are getting established, it should be a bit higher, around 10-16. Once the plant is mature, 15-20 is best.
To adjust it, add water to reduce the CF, and simply add more concentrate to increase the CF.
3. Adding Moisture
The best balance for healthy root growth, is for the growing medium to be both airy and moist. This promotes drainage – which prevents rot setting in – but still gives the roots access to what they need to grow and provide nutrients and moisture to the rest of the plant.
To check the moisture, squeeze the media. If water runs out, it is too wet. If no moisture appears at all, it is time to water it. As you become an expert in the media and your various pots, lifting them up can tell you if they are heavy enough (adequate water) or too light (getting dry).
4. Proper Irrigation
Run off is the term for the excess feed that pools in the dish under your pots when you water. You should see 20-30% of your watering coming through as run off each day. This will ensure the right nutrient concentration. If water does not flow freely through the media, it may be waterlogged and need care to increase air flow and drainage.
How to Remove Run Off
Do not let the plants sit in the run off. It should be removed before the plant can reabsorb it.
Mature plants should be irrigated 3-8 times per day, for 2 to 5 minutes. Alternately, you can measure by applying 4-6 litres per metre square. This can also vary with plant size and the temperature of the surrounding air.
No Run Off? Read this…
If you don’t get run off, but you know your soil is of a suitable density and drainage, then you can prevent nutrient build-up by reducing the strength and frequency of the feed. Try ¼ strength, every third feed in winter and every second feed in summer (when it’s warmer and there is more growth).
Wow, it looks like you’re all set to grow with coco!
If you need any other hydroponics equipment or materials, then consider browsing our range online here.